Before sending an SMS or MMS message, you need to activate a Sender ID on the Wavix platform. A Sender ID is the message sender details recipients will see on their devices. Sender IDs can be either numeric or alphanumeric presenting your brand or service name.
Important
You must use Numeric Sender IDs, if you want to enable 2-way messaging service. For one-way SMS you can use both Numeric and Alphanumeric Sender IDs.
The below steps are only mandatory if you’re planning to send messages using a U.S. or Canadian phone number as Sender ID. In case you will be using a mobile number from other countries or an alphanumeric Sender ID, please scroll down to the Create a Sender ID on the Wavix platform section.
Before sending or receiving an SMS, you need to have an active, SMS-enabled number on your Wavix account. If you already have it, the below steps are optional.
To purchase a number on your Wavix account:
Log in to your account
Select Numbers & trunks in the top menu and click Buy
Select US or Canadian area code you wish to purchase a number in
Choose a specific number or numbers and click the Buy now button
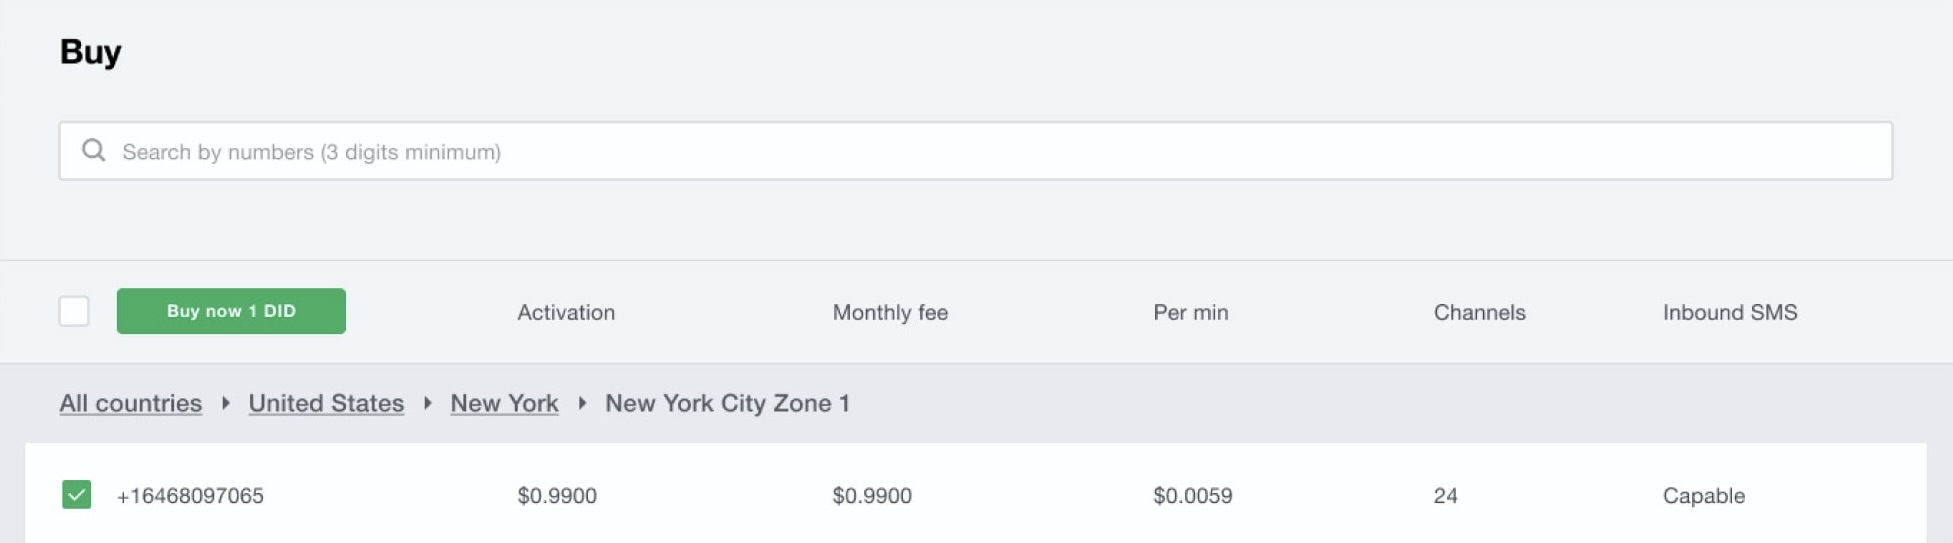
Fig. 1 Search and buy a number
You will be redirected to the Cart where you can confirm your choice and proceed with checkout.
Inbound SMS can be enabled on US and Canadian phone numbers only. To activate support of inbound SMS and MMS:
Select Numbers & trunks in the top menu and click My numbers
Select a number you want to activate inbound SMS on
Click on the down arrow to see additional details
Click Activate next to Inbound SMS
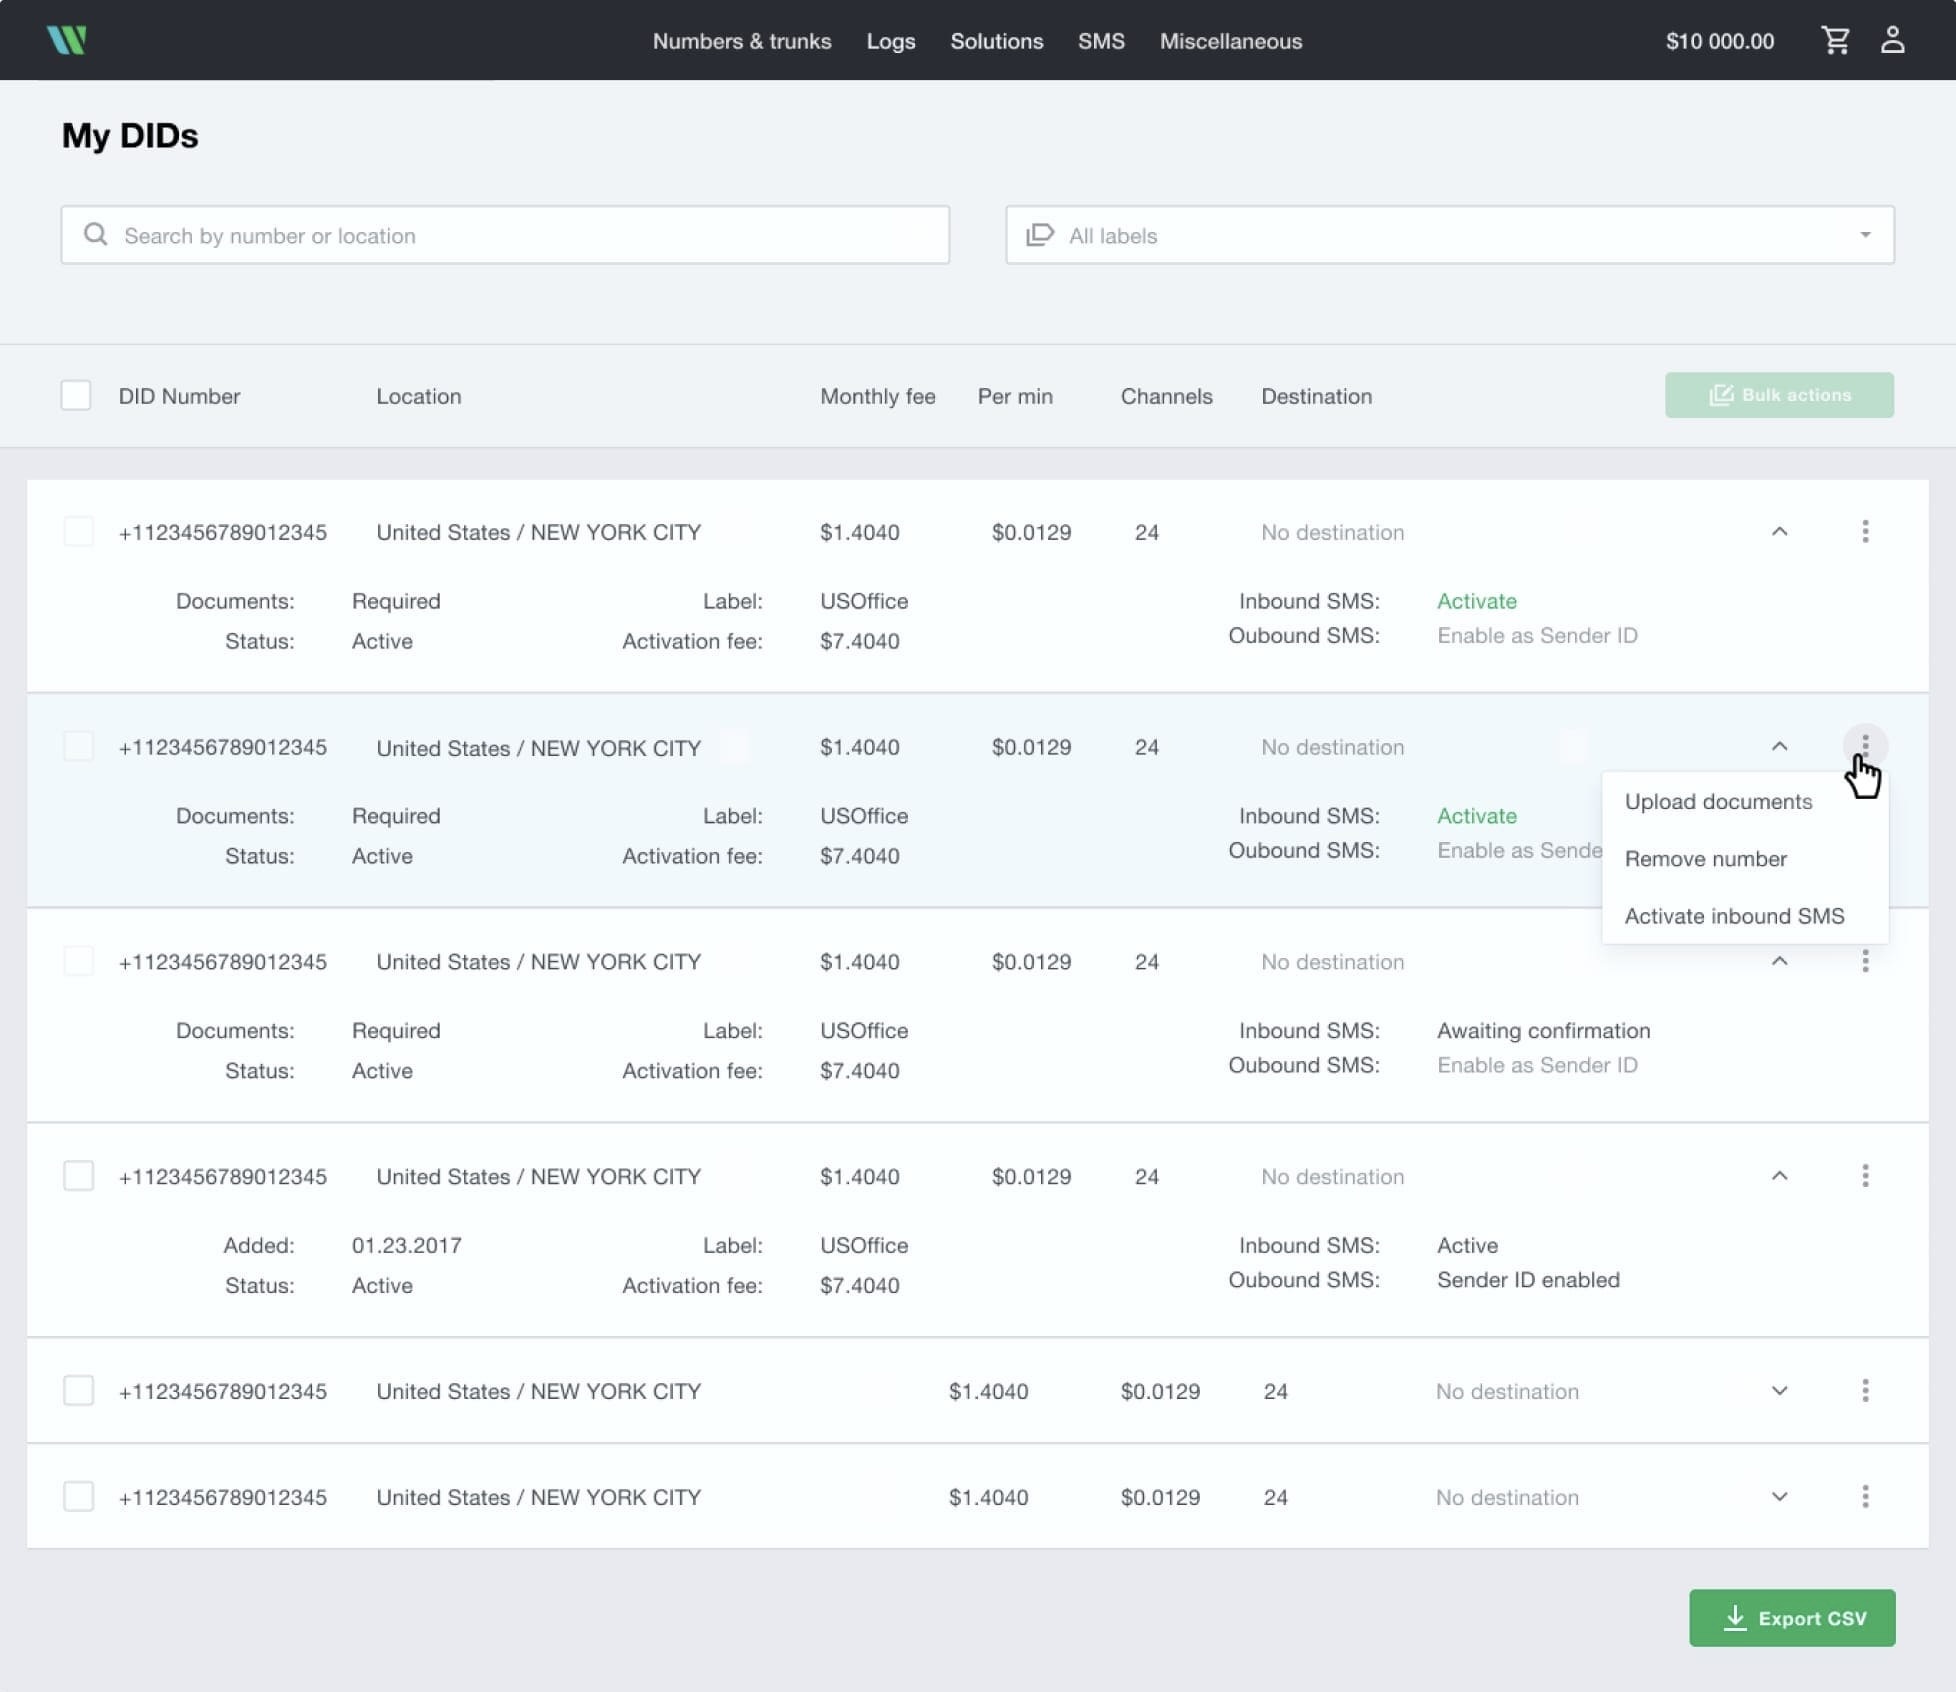
Fig. 2 Activate inbound SMS
In case of any questions, please raise a ticket in the support tab or email support@wavix.com
To create a Sender ID:
Select SMS in the top menu and click on Sender IDs
Then click add new Sender ID and select the Sender ID type, i.e. Alphanumeric or Numeric
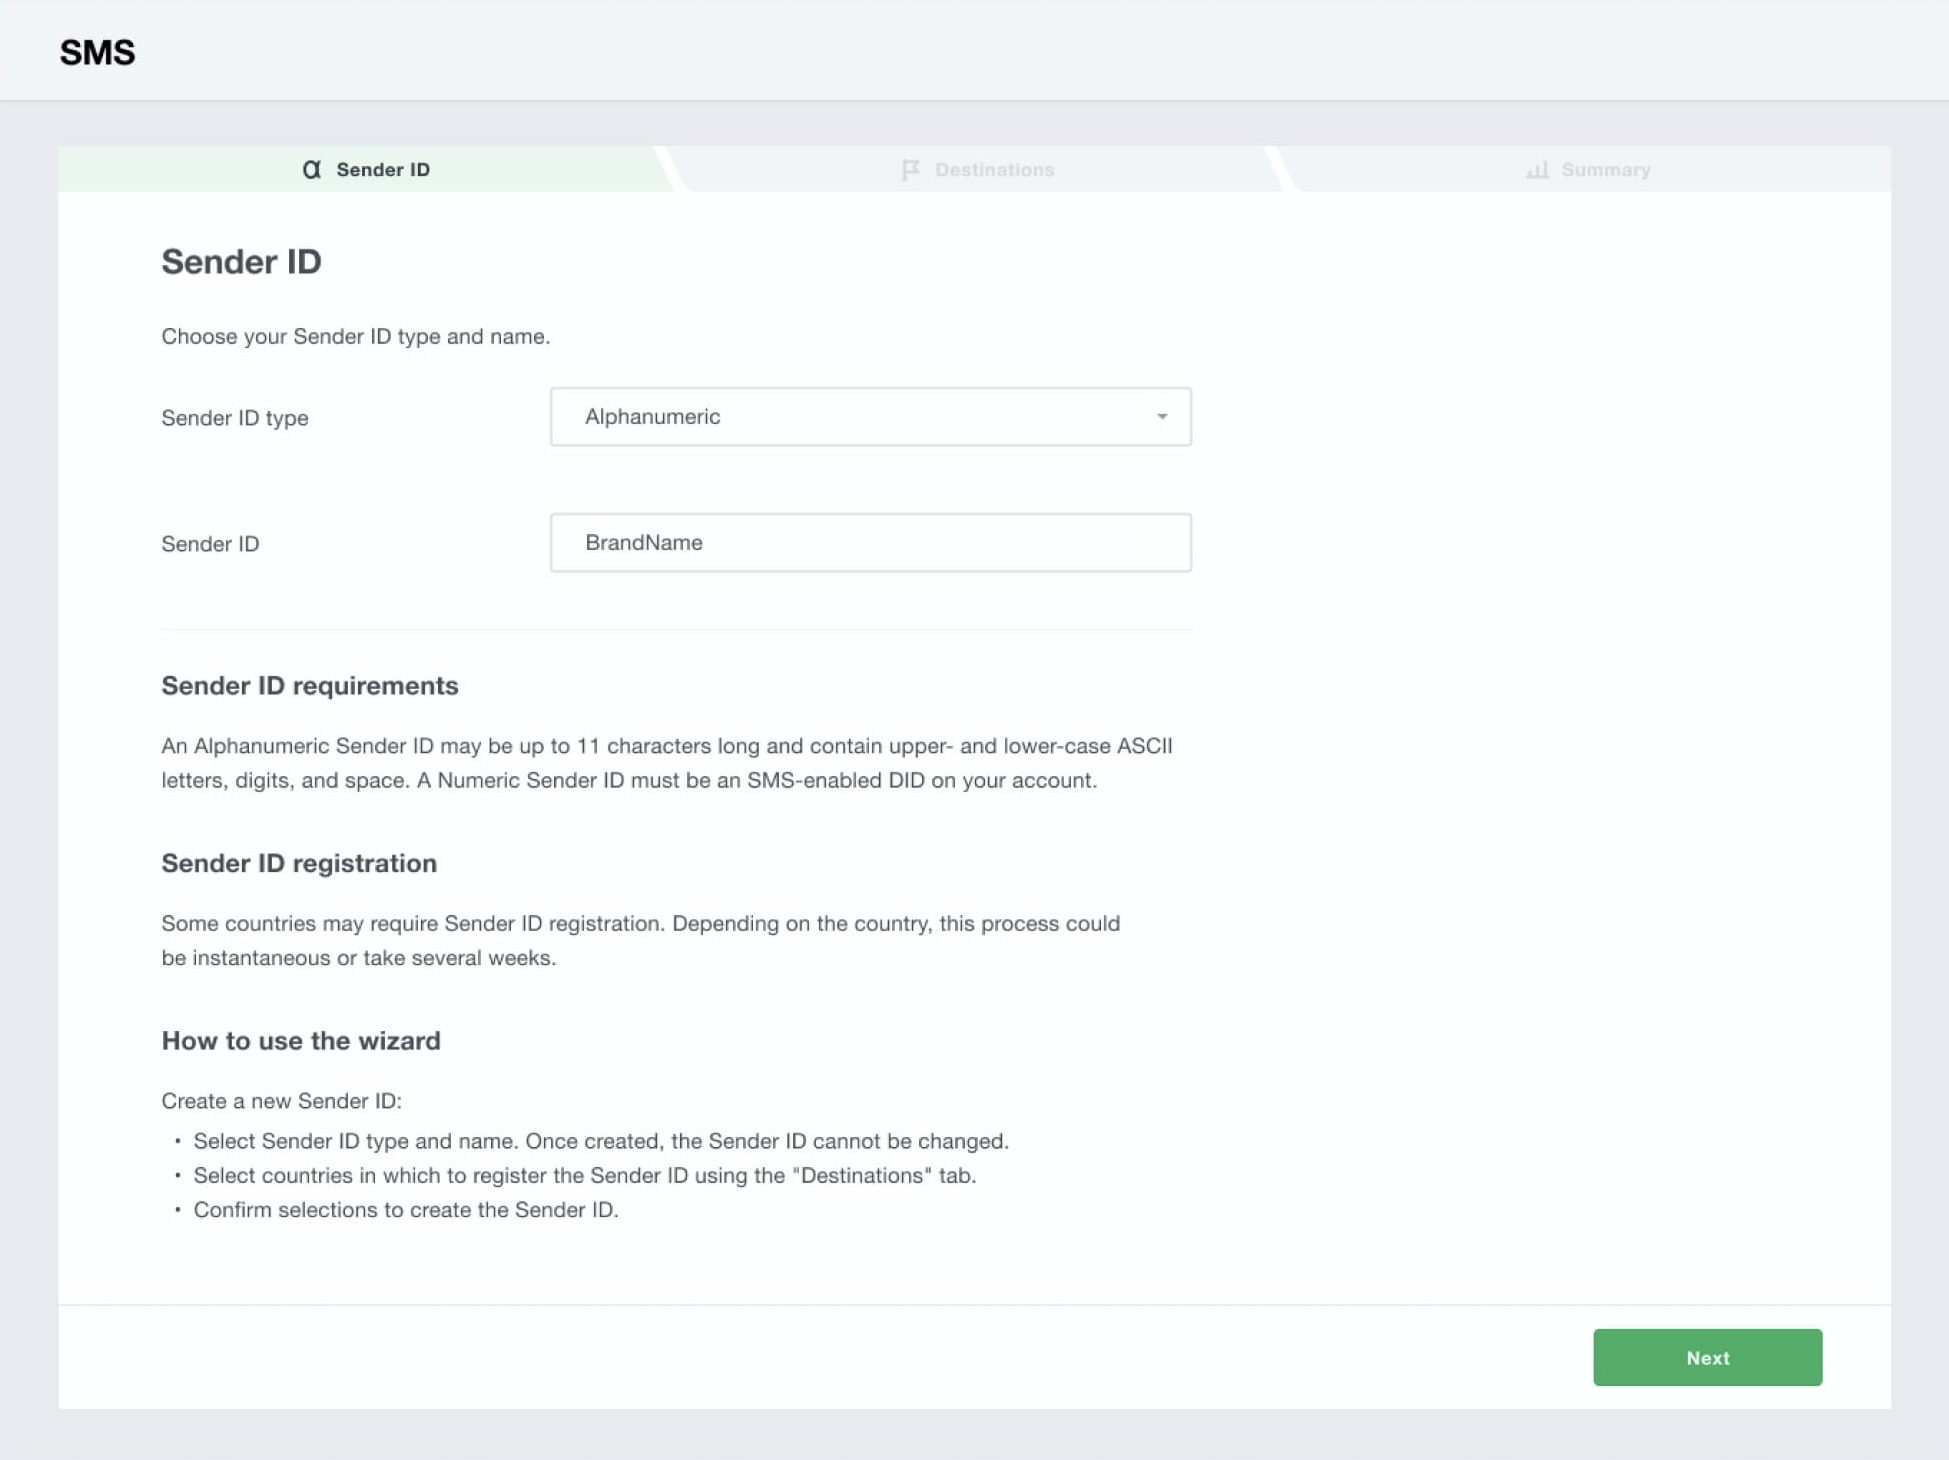
Fig. 3 Sender ID name and type
Alphanumeric Sender ID can be up to 11 characters long and can only include upper- and lower-case letters and the digits from 0 through 9, and spaced. A numeric Sender ID can be associated with an SMS-enabled number in your account only.
Important
If you have chosen the Numeric Sender ID type, but do not see any of your numbers in the Sender ID drop-down list, make sure the number you are looking for is actually SMS-enabled.
Select country(-ies) you will be sending SMS to. Depending on the destination countries, additional restrictions for Sender IDs may apply. Hover over i icon next to the country name to see the details. If the Sender ID Type you’ve selected is not supported for the destination, the country will be greyed out.
Note
Alphanumeric Sender IDs are not supported in a variety of countries, including the US and Canada, and may require pre-registration by local carriers in some others.
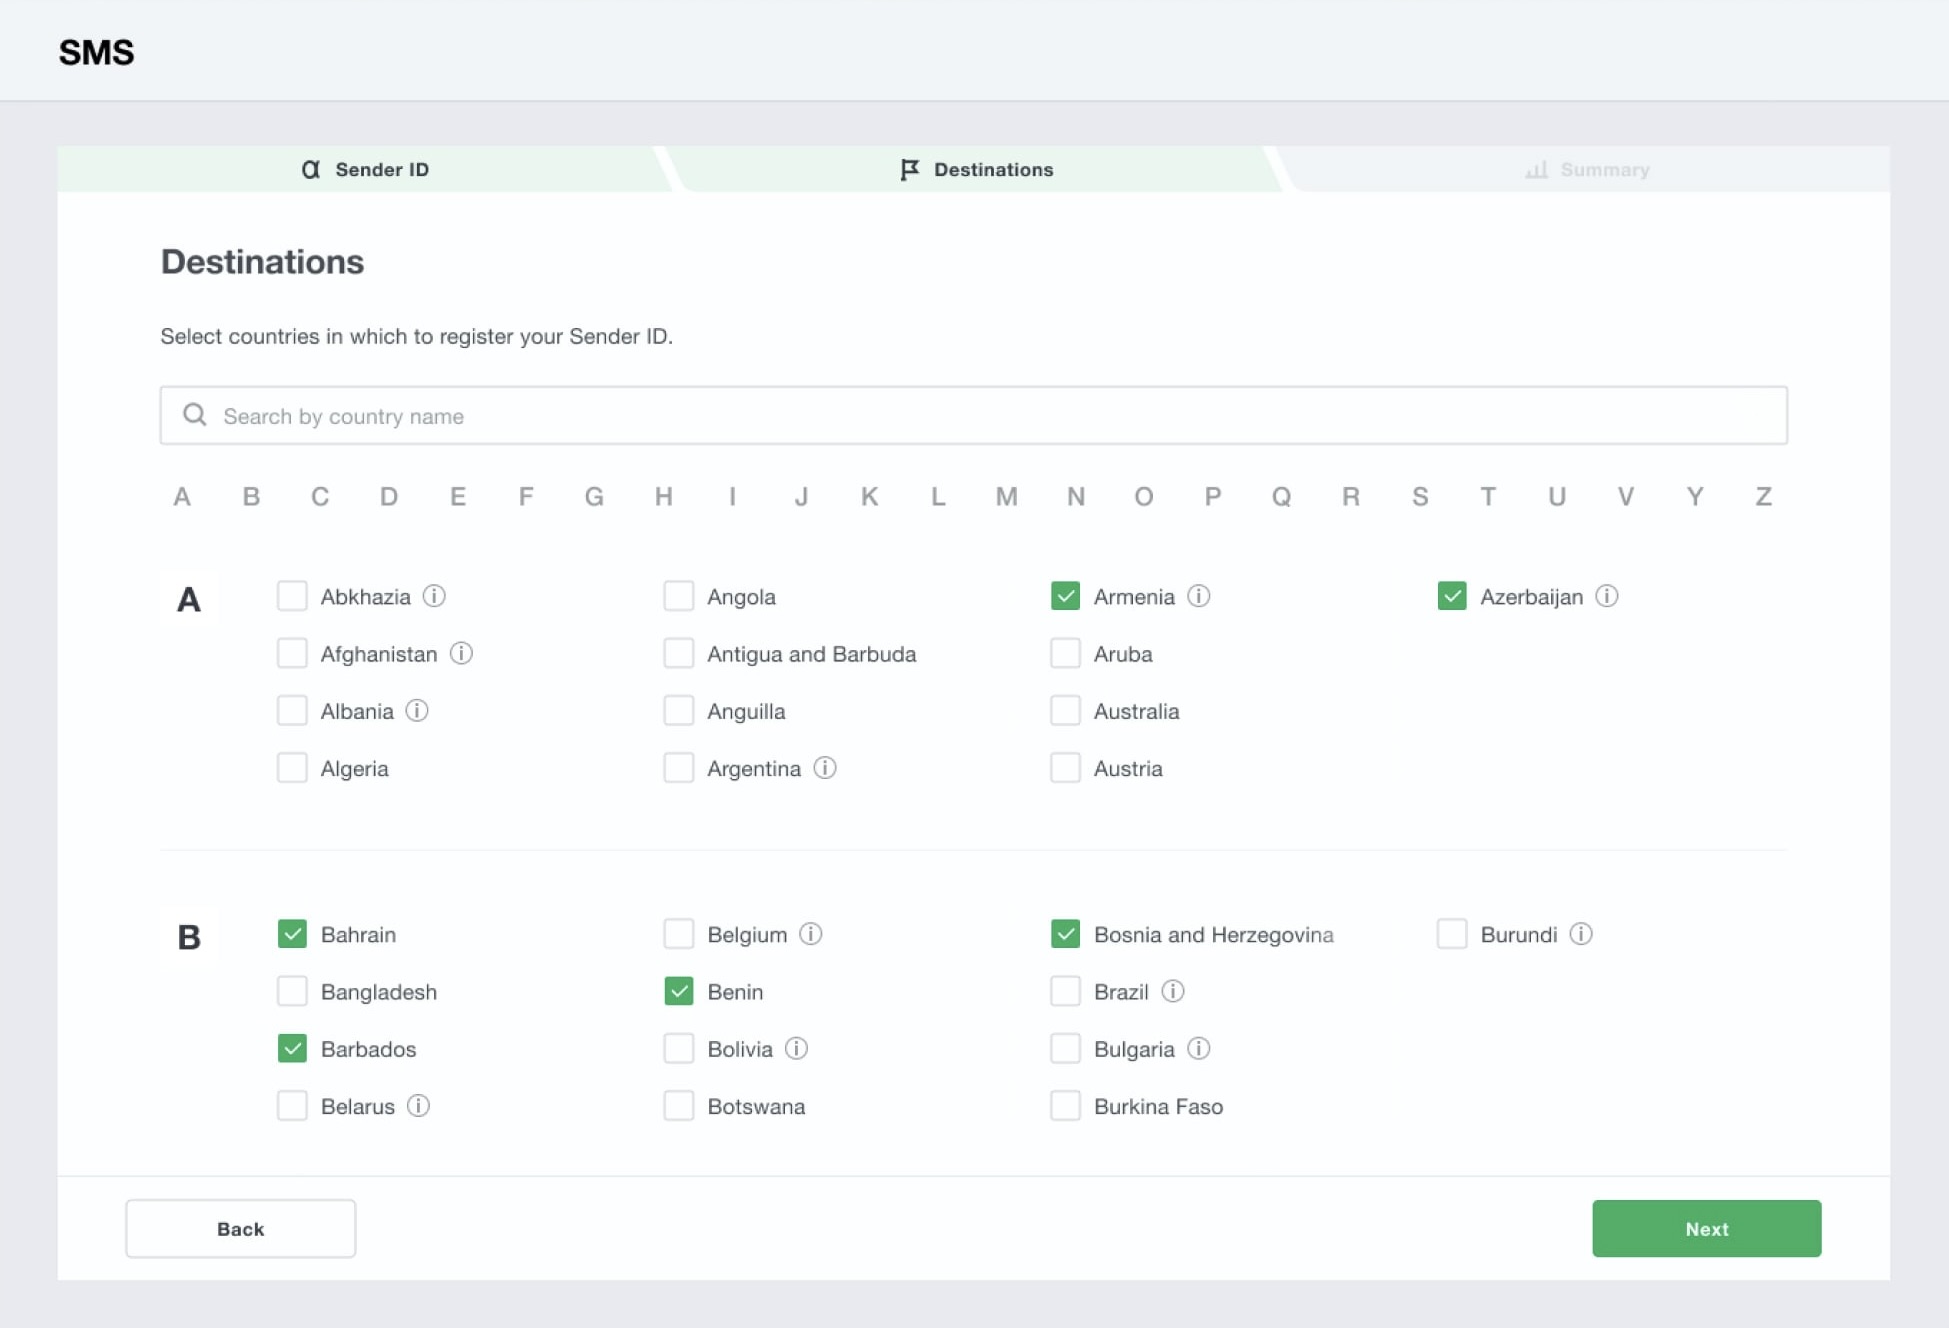
Fig. 4 Destination countries
Review your Sender ID and the list of destinations. Your Sender ID will be automatically allow listed in countries that do not require additional paperwork. A member of the Wavix provisioning team will reach out to you with additional information regarding the process of Sender ID registration in countries that do.

Fig. 5 Add SMS Sender ID to 3CX SIP Trunk
In order to send and receive SMS and MMS messages you must have a 3CX SIP trunk connected to Wavix. Please check the 3CX SIP trunk setup guide for more details.
Important
When adding a new SIP Trunk in 3CX you need to specify the previously created Sender ID in the field labeled Main Trunk No.
In order for your 3CX instance to be able to send and receive messages, you need to add your Wavix account API key in the field labeled Api Key and set up Default SMS endpoint in your Wavix account.
Click on the registered SIP Trunk in 3CX and then on the SMS tab.
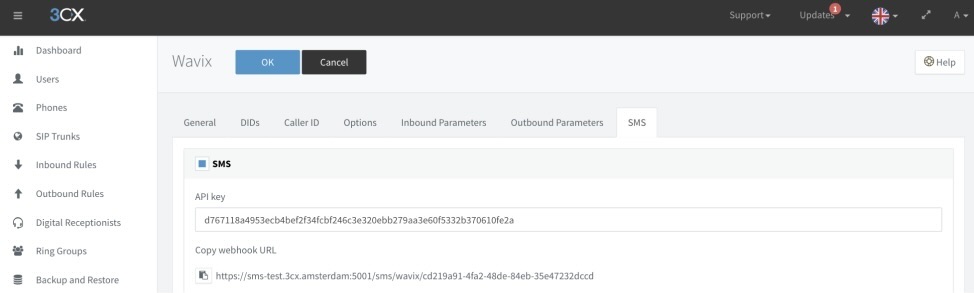
Fig. 6 SIP Trunk SMS settings
Log in to your Wavix account at app.wavix.com
Click on the My account icon in the top-right corner and then click API keys.
Copy an active Wavix API key and paste it into the field Api Key in your 3CX.

Fig. 7 Wavix API key
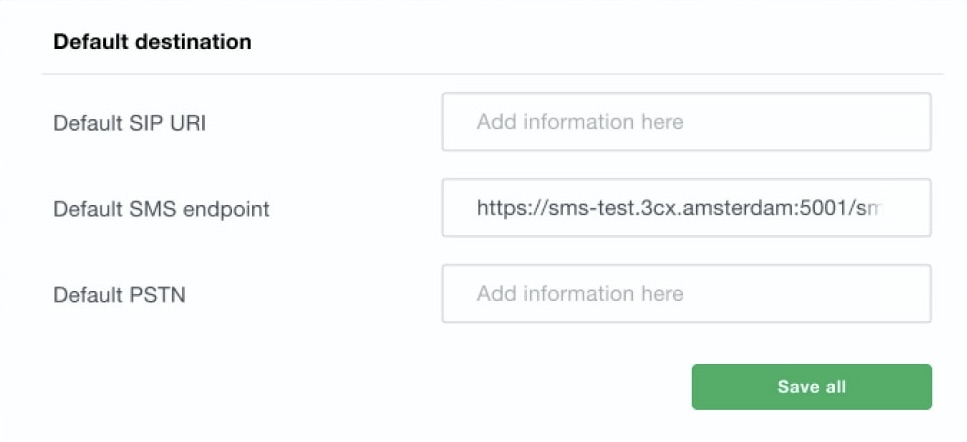
Fig. 8 Wavix Default SMS endpoint
Copy Webhook URL from 3CX and paste it into the field Default SMS endpoint field in your Wavix account. Click Save all.
Click OK to save 3CX SIP Trunk configuration.
To test your 3CX setup send an SMS to your mobile phone number. Go to Users in the left-hand side menu, click on the default 100 extension and download a mobile application by scanning the QR code on the page. Log in to the app, go to the Chat tab and send an SMS.
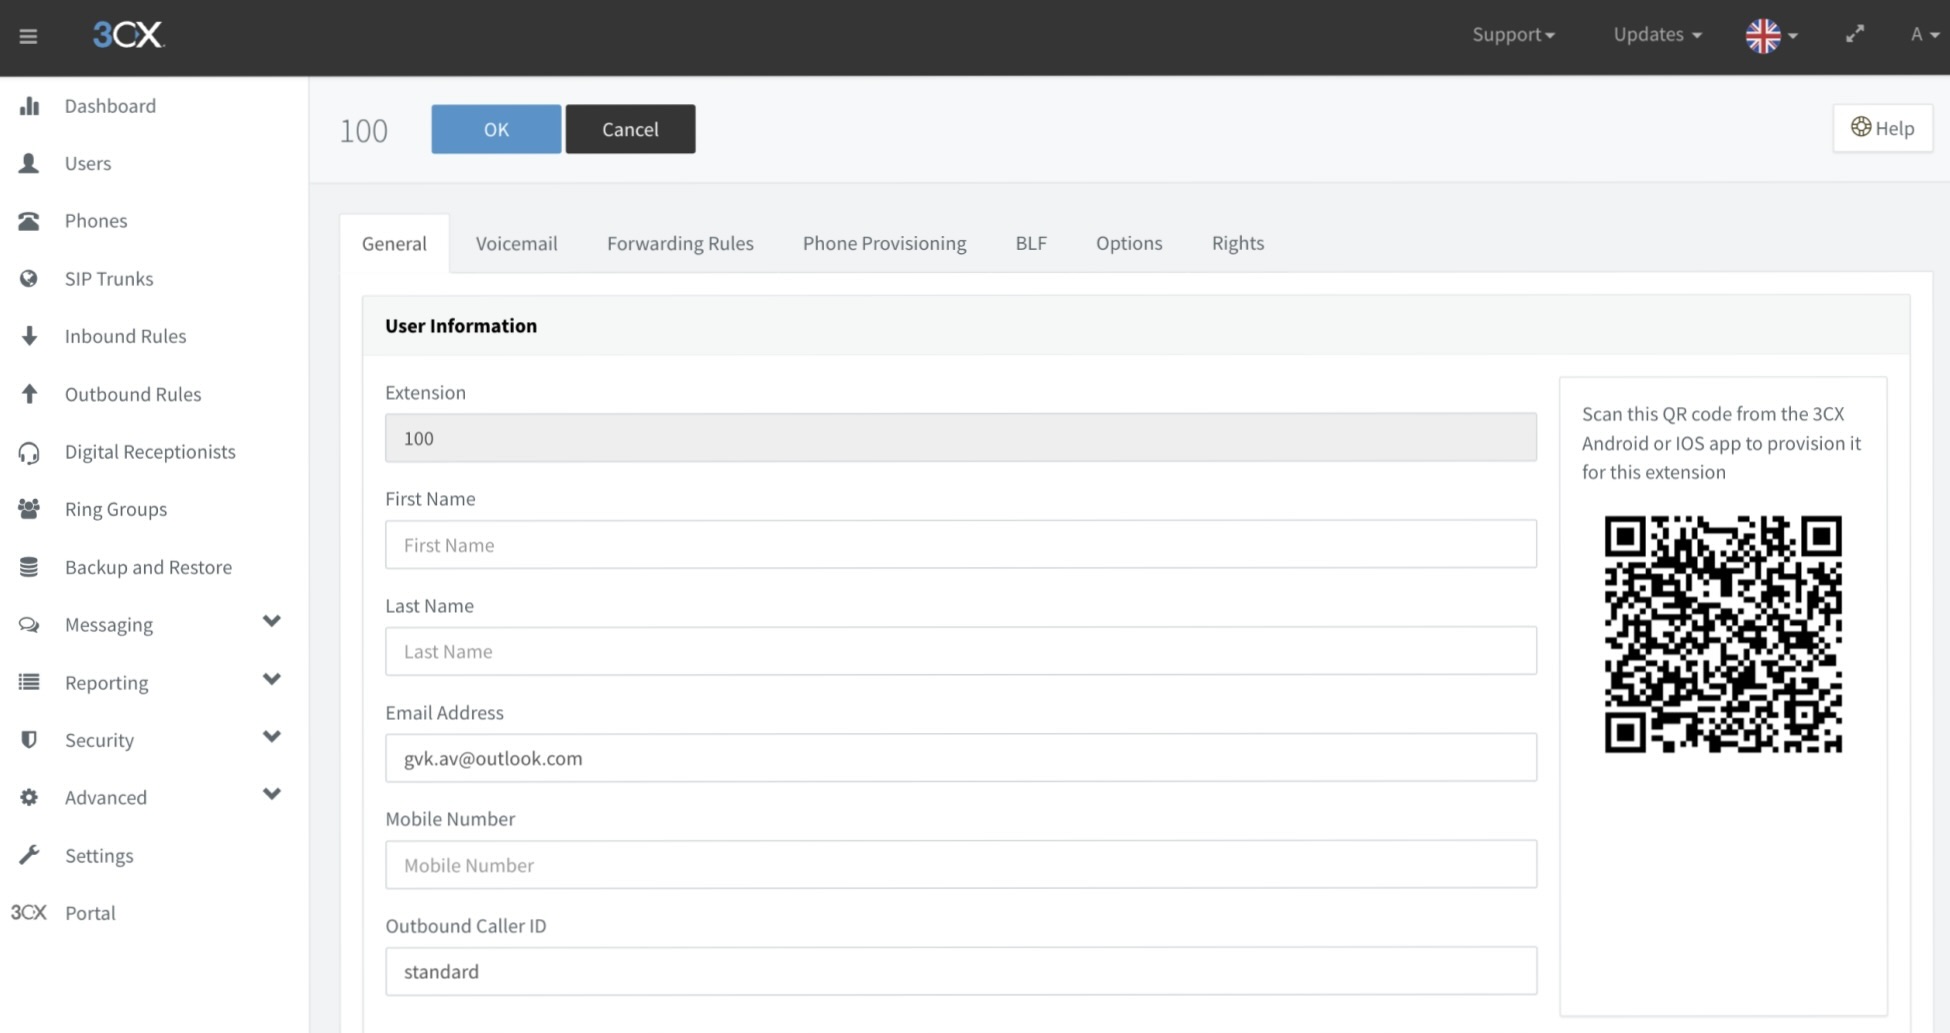
Fig. 9 3CX extension
If outbound SMS fails check the following:
- You’ve completed all the steps in this guide
- The destination phone number in the international E.164 format
- The Sender ID you’re using is allow listed for the country you’re sending the message to
Create a more engaging and impactful communication experience with Wavix. Make calls, send texts, and create tailored solutions to wow your customers.